Sider

Viser opslag med etiketten Ink it blomster. Vis alle opslag

mandag den 30. maj 2016

FEMININT KORT


Jeg elsker "træ papir" og at mixe det med det lyse feminine gør bare "træ papiret" endnu
smukkere.
Jeg har brugt papir fra NEWPORT og BARNMARKET og flere forskellige INK IT BLOMSTER.


                                                         Mange scrap hilsner
                                                                      Lisa.

torsdag den 28. april 2016

Studenterkort med Newport


Tiden, hvor dette års studenter bliver færdige, nærmer sig med hastige skridt.
Derfor har jeg til i dag lavet 2 studenterkort med designpapir fra Newport.
Jeg har også brugt Ink-it blomster og chipboards fra Wycinanka.


Kort til HHX-student


Kort til STX-student


Tusind tak fordi du kigger med her på Riddersholm Design's Blog.
Ha' en dejlig dag.

Anne-Mette


torsdag den 14. april 2016

Konfirmationskort med Newport.

Forårets konfirmationer er over os. I dag vil jeg derfor vise jer et feminint og et maskulint konfirmationskort, jeg har lavet med papir fra Newport serien.

Ginen er udstanset med en Movers and Shapers fra Tim Holtz,
hvor Doily-dien ligeledes er fra.
Banner er die fra Cheery Lynn. Jeg har brugt Ink-it blomst og blonde fra butikken.


Jeg har brugt Chipboards fra Wycinanka.
Motivet er stemplet på designpapir og har fået et par strøg Wax Paste.
Teksten er lavet med die.


Tak fordi du besøgte bloggen. Håber du får en dejlig dag.

Anne-Mette


torsdag den 24. marts 2016

Konfirmationskort med Newport.

Foråret er over os, og dets konfirmationer nærmer sig med hastige skridt.
Derfor har jeg i dag valgt at vise jer 3 konfirmationskort lavet med designpapir fra Newport serien.

1. KORT:

På det første kort har jeg i det ene hjørne brugt det nye diesæt fra Tim Holtz: Mixed Media #2.
Det nederste højre hjørne er revet af, og kanten her har fået et lag brun/kobber Glitter Glass.
Der hvor hjørnet "mangler", har jeg påsat nogle swirls fra udstansningen.

Jeg har støbt et kors med stengips i en silicone form. Dette kors har jeg først malet med den lyse: Sparkling Silver Wax Paste og dernæst med et tyndt lag Copper Metal Wax Paste.
Det giver den smukkeste blanke og glitrende overflade.
Der er brugt Ink-it blomster, twine og chipbords fra Wycinanka.

Den øverste sommerfugl er klippet ud af designarket og har fået et lag klart fint Glitter Glass på vingerne.

2. KORT:

På det andet kort har jeg i det ene hjørne igen brugt det nye diesæt fra Tim Holtz: Mixed Media #2.
Teksten er lavet med en die fra Nellie Snellen.

Her har jeg brugt Ink-it blomster, der har fået et pift af Mr. Hueys color mist.
Chipboards fra Wycinanka, silkebånd, twine og en stofblomst.

Silhouetten af pigen er udstanset med en die fra Dixi Craft.

De 2 af sommerfuglene er klippet ud af designarket og har fået klart fint Glitter Glass.

3. KORT:

Det sidste kort er et maskulint kort.


Hjørnerne er udstanset med Tim Holtz Mixed Media dies.
Silhouetten er udstanset med en die fra Dixi Craft. Teksten er et stempel.

Under designpapiret er et lag glitterkarton. Stjernen er udstanset i kork, karton og glitterkarton.

Tak fordi du kiggede med her på bloggen i dag.
Jeg vil ønske jer alle en dejlig påske.


Thanks for visiting our blog today.
Happy Easter to all of You.

Anne-Mette

torsdag den 10. marts 2016

Newport Easter/Spring Card

Today I want to show you this easter-card using design papers from the Newport Collection.
This collection is perfect for spring/summer projects and i look forward to work with 
these gorgeous papers in the coming months.

Newport Easter/Spring Card

I have used Clear Glitter-glass on the nest. Chipboard is a Wycinanka.

Ink-it flower, hydrangea, sweetheart blossoms, feathers, twine and silk ribbon

The butterfly I have cut out and given some Clear Glitter-glass on its wings.

The birdhouse is made in a silicone mould from the shop.

The Easter-bunny is stamped.

I hope you have enjoyed your visit here at the Riddersholm Design blog.
Have a nice day.

Anne-Mette


torsdag den 25. februar 2016

Newport Easel Card

Today I want to show you, how I made this Easel card.
Here in Denmark it is still cold, but some days the sun is shining and I long for a day by the beach. 

This Easel Card is made with papers from the gorgeous Newport serie with beach theme.
Below you will see some pictures to descripe the Tutorial of this Card.

I have used a die from Waltzing Mouse Stamps for my cardbase. It is scalloped and stitched, but you can use any other die in the size you wish. The first part of the base has to be twofold. As you see, I have folded my cardstock and the edge of the die (over top of the card) must not cut the cardstock when you run it through your die-cutting maschine.

 At the right side you see the twofold cardstock opened. Now you have to make a scoreline at the middle, where the bone folder is placed on the picture. Now fold the card again in half and by the new scoreline you must fold opposite from the first fold. The two pieces at the left side are made with the same size die as your card-base. They will be your front and back of your card-base.

I make both the front and the back piece, so that my card-base have the same scalloped and stitched edges all around the card when it is ready for decoration.

Then glue the front and back to the two-folded card base.


Now your card-base is ready for decoration.

I have made these pieces for my decoration. 
Front+back: The "lightblue" pieces are 0,5 cm smaller than the sides of the card-base. And the designpaper pieces are 1,0 cm smaller than the sides of the card-base.
For the inside pieces: 
Cut 2 pieces "Lightblue" 1,0 cm smaller than the sides of the card-base, and cut them in half. 
Cut 2 designpaper pieces 1,5 cm smaller than the sides of the card-base and cut them in half.

The front of the card. I have used 3D foam.

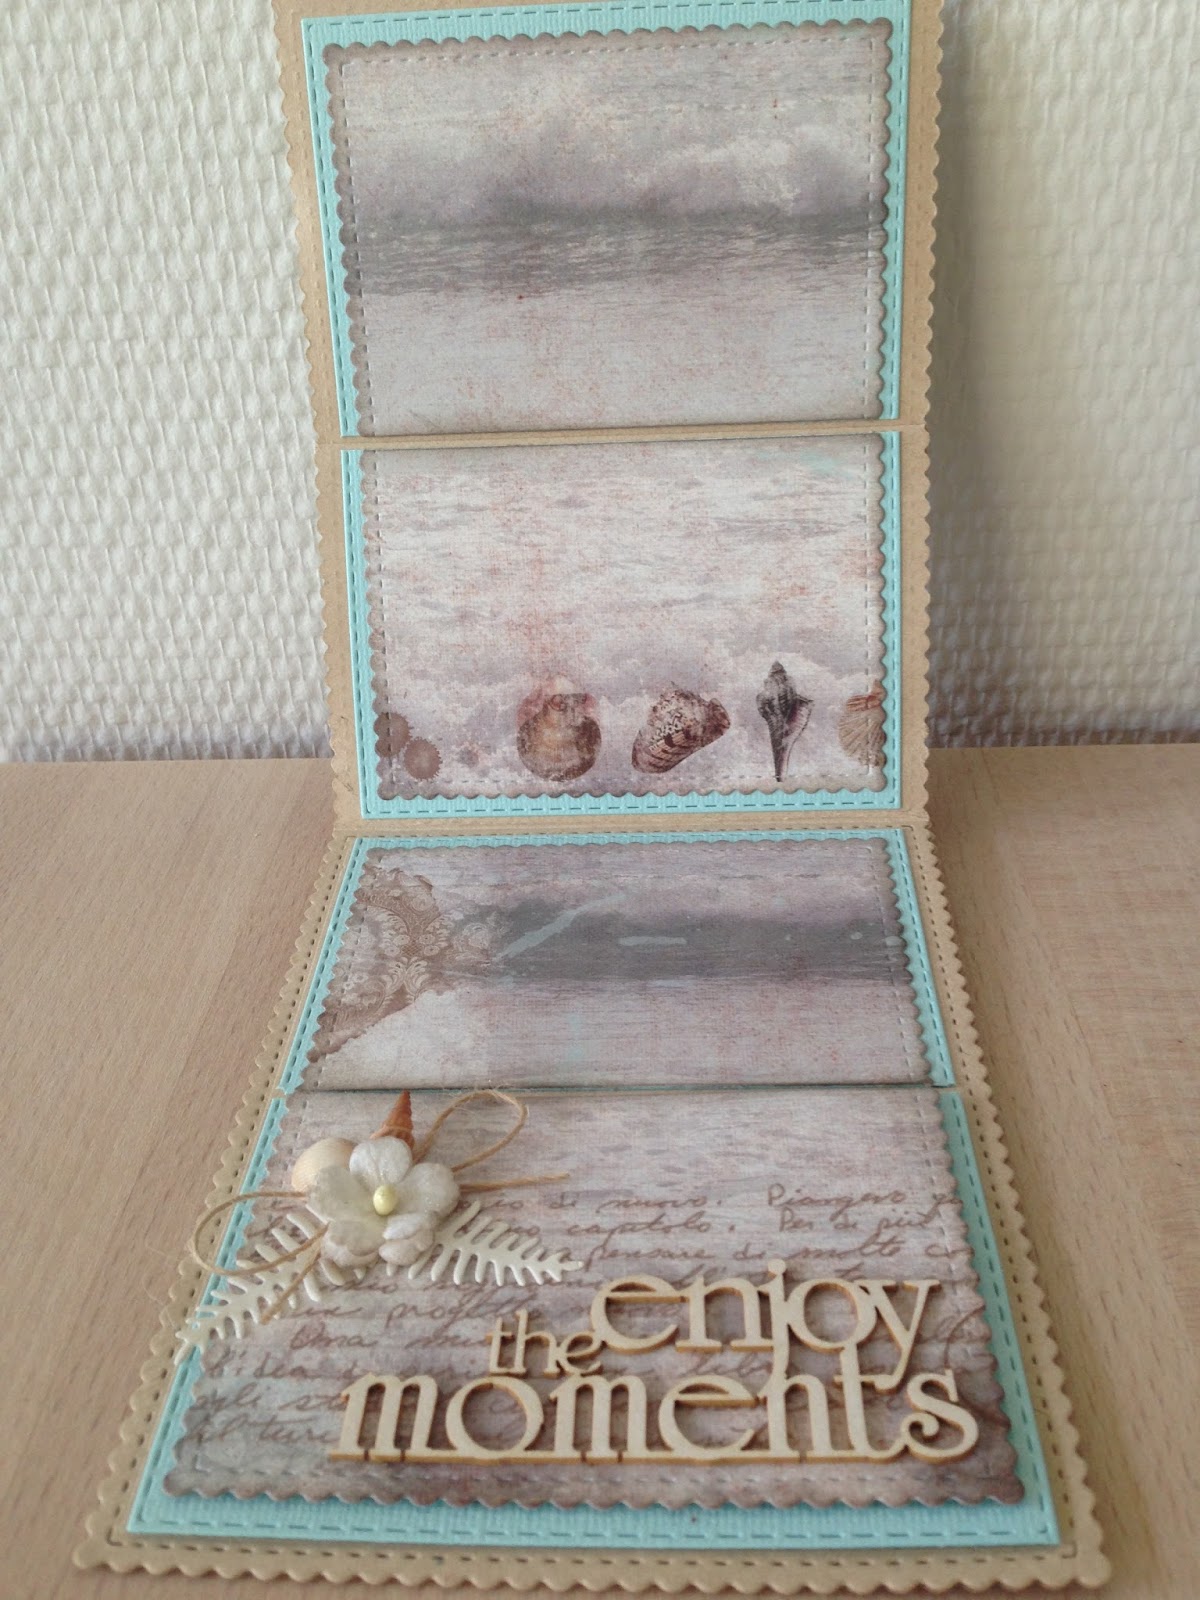
The inside of the card. The upper 3 parts (3/4) is glued to the card-base. The lower part: cardstocks are added with 3D foam. When you add the lower 1/4 of the inside with 3D foam, you ensure, your easel card can stand up by it self. (You could add an embellishment instead)

From the side.


It stand by it self.

Inside of the decorated card.

The frame is made in a silicone mould. The sentiment is from a cut-out sheet.
The snail shells, I have collected by the beach, and boiled them to avoid bad smell.

At the flowers I have used my Wink of Stella Clear to get a fine touch of glitter. 
Love it :-)

Thanks for visiting the blog today and have a nice day.

Anne-Mette